Welcome to Project Design
Holiday Wrap!!
For those of you who happen to be visiting my blog for the very first time, WELCOME!! I am so glad you are here and I hope you are enjoying all the wonderfully talented bloggers and their helpful tips on Holiday wrapping!!
Shall we get started?.........
Do you feel over whelmed when it comes to gift wrapping?
I am going to share with you my approach and how it helps me stay organized and happily wrapping….
First, I have to admit that I am like a kid in a candy store when it comes to wrapping paper and ribbons.
When you think about it, choosing your paper and ribbons is like choosing fabrics for a room in your home.
Make it fun and coordinate them and organize them in a way that they look pretty and are easily accessible.
When I purchase my papers I usually start with a color scheme or sometimes a particular theme.
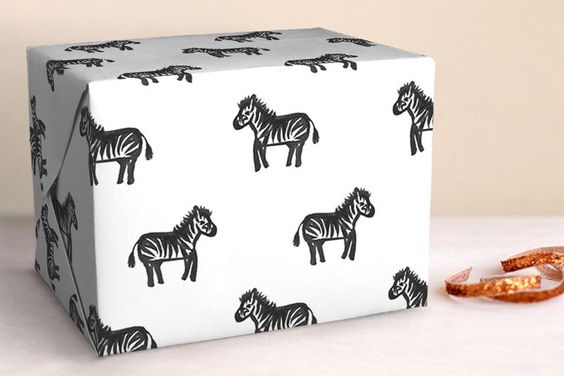
Of course you will notice my signature black and white striped wrapping paper is always in the mix in our home.
Choose A Signature Wrap!
The very first time I ever heard of someone using a signature wrapping paper was Colin Cowey, his paper was a dark chocolate brown.
That made me start thinking about what would I choose, and it was a very simple choice for me since I am a lover of black and white and stripes.
I put my papers together just like I do for pillow fabrics on my sofa. It's all about coordination and if you have trouble doing that you can often find groupings of papers that are already put together for you. I noticed that Target had a few fun patterns put together for your choosing this year...
These were my paper choices for 2016 Christmas....
Here are the packages lined up waiting for their ribbons and bows.......
I actually place my packages under the tree and get them in an arrangement I like before adding the ribbons, then I can tell which package need a certain color ribbon. I am all about coordinating things, plus I really enjoy this whole process.
Nothing terribly fancy or complicated, just pretty coordinating papers and lovely soft double faced satin ribbon that drapes nicely. You won't see stiff wired ribbon on my packages, I like the ribbons to fall naturally.
In 2015 I chose an all green black and white color scheme and here are the line-up of papers that I used. You will notice that my papers are not always what you might use at Christmas time, but once the ribbons are added and they are under the tree the say CHRISTMAS big time!!
Don't limit your creativity by only shopping in the Christmas aisles for your papers.
This was our very first Christmas in our new home in 2015.
All wrapped up and tied up with ribbons and bows.
The other thing I like to do with my wrapping and ribbons is to keep them in baskets and organized so that when I need to do my wrapping they are ready at hand.
I actually keep my wrapping papers in a French Market basket and sometimes I keep it by the tree and it just adds to the Christmas decor.
Let me show you how I did it one year.....
Tools needed for wrapping……..
ribbit")
You will notice the little basket on the right has my tools, scissors, tape, glue stick, markers all together. There is nothing that will slow down the process more than not being able to find the scissors or the tape so I have found that corralling them in a basket really helps me out.
Baskets to hold everything are so helpful……..
ribbit")
All my ribbons are lined up in a basket ready to make a pretty bow.
I have fun paper ribbon with stickers that have our family name on them.
Jingle bells were the theme for this years Christmas so I have a bowl full to add to the packages.
I don’t have a designated room to do my gift wrapping in, but I do have a large kitchen bar that works well.
By getting pretty papers and ribbons it really helps in making your packages stand out. I just tie simple uncomplicated bows on my packages.
I have found that buying a good quality ribbon is so helpful in making a pretty bow. I have never been a big fan of wired ribbon. I love a beautiful velvet, or my favorite is a double sided satin ribbon.
Here is a sneak peek of this years wrapping papers all lined up. This years scheme actually started right after last years Christmas celebration when I found a pillow on sale that I had admired for a few years.
He is goofy, quirky and fun so that dictated the colors I am using this year......
You can't look at this fellow without smiling so my color scheme had to be cheerful and happy. This year it is all about red, pinks and green....
Stay tuned for more blog post on how I am going to use all of this and especially how I will wrap my gifts this year!!
I hope this will help make gift wrapping a little easier and more enjoyable for you. Below you will find the sources I use for my gift wrapping supplies.
Nashville Wraps
Ribbons: Paper Mart
Container Store
Paper ribbon and round stickers: Paper Jacks on Etsy
Don't forget to visit the other bloggers that are participating in....
"Project Design Holiday Wrap!"


ribbit")
ribbit")
ribbit")